Self-Host Analytics - How I Self-Host Plausible Analytics with Podman Kube and Quadlets
Table of Contents
One of the cool features about podman, is that its more than just a containerization tool.
You have podman kube which is a kubernetes style way of defining and orchestrating your containers with a .yaml file and simply executing that file.
Then you also have podman quadlets which turns your containers into full blown systemd services with all the bells and whistles of a normal systemd service.
Using both of those features I was able to very easily define and manage my website's analytics service Plausible.
Breakdown what needs to be hosted for Plausible Analytics
Plausible is quite a simple yet effective service to self-host, let's have a look at the dependencies.
- plausible analytics
- clickhouse db (dependency)
- postgresql db (dependency)
Not bad right, pretty simple and gets the job done nicely.
Using Podman Kube to orchestrate Plausible Analytics
Starting off with podman kube, I want to group my analytics containers into a single .yaml config file that allows me to easily spin up all the infra or tear it down instead of managing individual containers - which can get annoying after the 4th container.
Step 1: Setting up the Infra with Podman Pods
What are podman pods? - Well exactly as the name implies: a way of grouping containers together on a shared network, like a pod of seals, pun intended.
When we setup our pod and register all our containers under it, we can simply manage the pod instead of the individual containers if we wanted to stop or start the whole group of containers.
I'll be using the podman pod command to create the pod like this:
# pod port 8000 is plausible
# pod port 5432 is pgsql
# pod ports 8123, 9000 are clickhouse ports

# I only really want to connect to plausible and maybe pgsql
# so you can omit the port mappings for services you aren't going to
# connect to from outside of the pod. I kept it in so you can see what it looks
# like to expose them.

podman pod create \
    -p 8000:8000 \
    -p 8432:5432 \
    -p 8123:8123 \
    -p 9000:9000 \
    --name jazedev
Pod Networks - When we create a pod, it creates a network namespace that all of our pod containers are connected to by default. It's a custom network so it includes DNS; which means we can simply use the container names for them to speak to each other.
Since it creates a network, all the port mappings need to be defined when we create the pod, you cannot edit them. If you'd like to edit them: you would need to delete the pod and recreate it with the new port mappings. TIP: Keep your commands handy in a text file when working with pods, makes it quick and easy to recreate.
How does the port mapping work for pods?
Good question, you map the host port to the port within the network, when you run a container it can bind to any port within the network without issues. So if you wanted to map nginx http port (80) to 8000 on host, it would look like this: -p 8000:80
In the podman pod create, snippet above. I use plausible and want to access that outside of the pod and plausible listens to port 8000 by default. So I'd like to use the same port on host which leaves us with a port mapping of: -p 8000:8000.
Now I need to setup the actual containers that will be running on the jazedev pod:
For ClickHouse we need a users.xml file and that's it really:
<!-- users.xml -->
<clickhouse>
  <users>
    <plausible>
      <password>secret</password>
      <networks>
        <ip>::/0</ip>
      </networks>
      <profile>default</profile>
      <quota>default</quota>
    </plausible>

    <default>
      <password></password>
      <networks>
        <ip>::/0</ip>
      </networks>
      <profile>default</profile>
    </default>
  </users>

  <profiles>
    <default>
      <max_threads>4</max_threads>
    </default>
  </profiles>
</clickhouse>
Let's setup the infrastructure containers:
# PostgreSQL DB
podman run -d \
    --pod jazedev \
    -v jaze-pgdata:/var/lib/postgresql:z \
    -e POSTGRES_PASSWORD=secret \
    -e POSTGRES_DB=plausible \
    --name pgsql \
    postgres:latest

# Clickhouse DB
# IF: you're using git bash on windows, prepend MSYS_NO_PATHCONV=1 below
# e.g. MSYS_NO_PATHCONV=1 podman run -d \ ...
podman run -d \
    --pod jazedev \
    -v jaze-clickdata:/var/lib/clickhouse:z \
    -v ./users.xml:/etc/clickhouse-server/users.xml \
    -e CLICKHOUSE_DB=plausible \
    --name clickhouse \
    clickhouse/clickhouse-server:24.3-alpine

# Plausible Analytics
# IF: you're using git bash, do the same as above.
podman run -d \
    --pod jazedev \
    -e DATABASE_URL=postgres://postgres:secret@localhost:5432/plausible \
    -e CLICKHOUSE_DATABASE_URL=http://plausible:secret@localhost:8123/plausible \
    -e SECRET_KEY_BASE=U3VwZXJTZWNyZXRLZXlUaGF0SXNWZXJ5TG9uZ0FuZFNlY3VyZTEyMzQ1Njc4OTAxMjM0NTY3ODk= \
    -e BASE_URL=http://localhost \
    --entrypoint sh \
    --name plausible \
    ghcr.io/plausible/community-edition:latest \
    -c "/entrypoint.sh db createdb && /entrypoint.sh db migrate && /entrypoint.sh run"
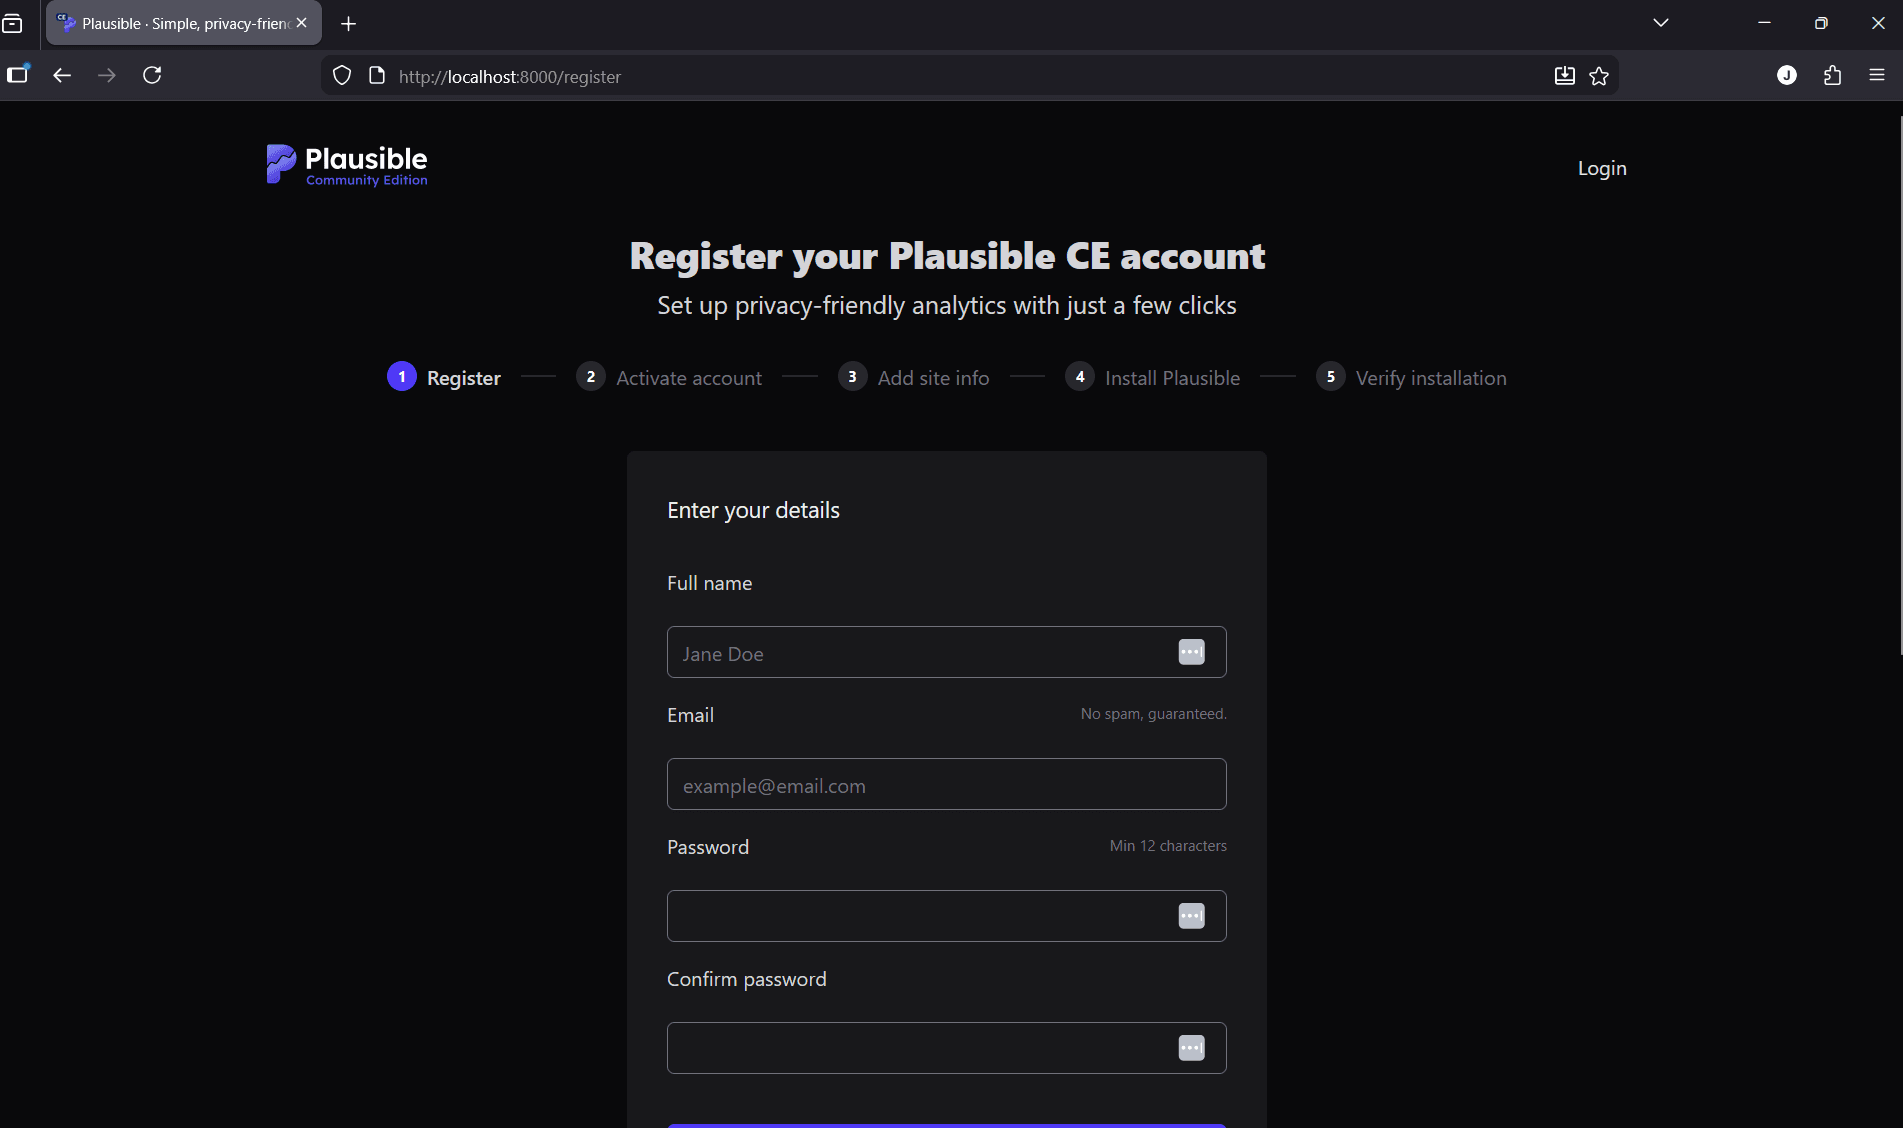
After running all of those commands, and you open the following link in your browser: http://localhost:8000, you'll see the following:
Step 2: Generating the Kube file with Podman Kube Generate
Now that my infra is up and running, we can start to use the awesome feature podman kube to setup a .yaml file to easily spin this up and tear it down.
Let's do that:
#usage
podman kube generate <container|pod> -f path-to-save-file

# Let's create the yaml file
podman kube generate jazedev -f jaze.yaml
What you should notice is that the jaze.yaml file was created in the terminal working directory, you can also specify a path in the above command or simply cd to where you want the file created.
Step 3: Running the Kube file with Podman Kube Play
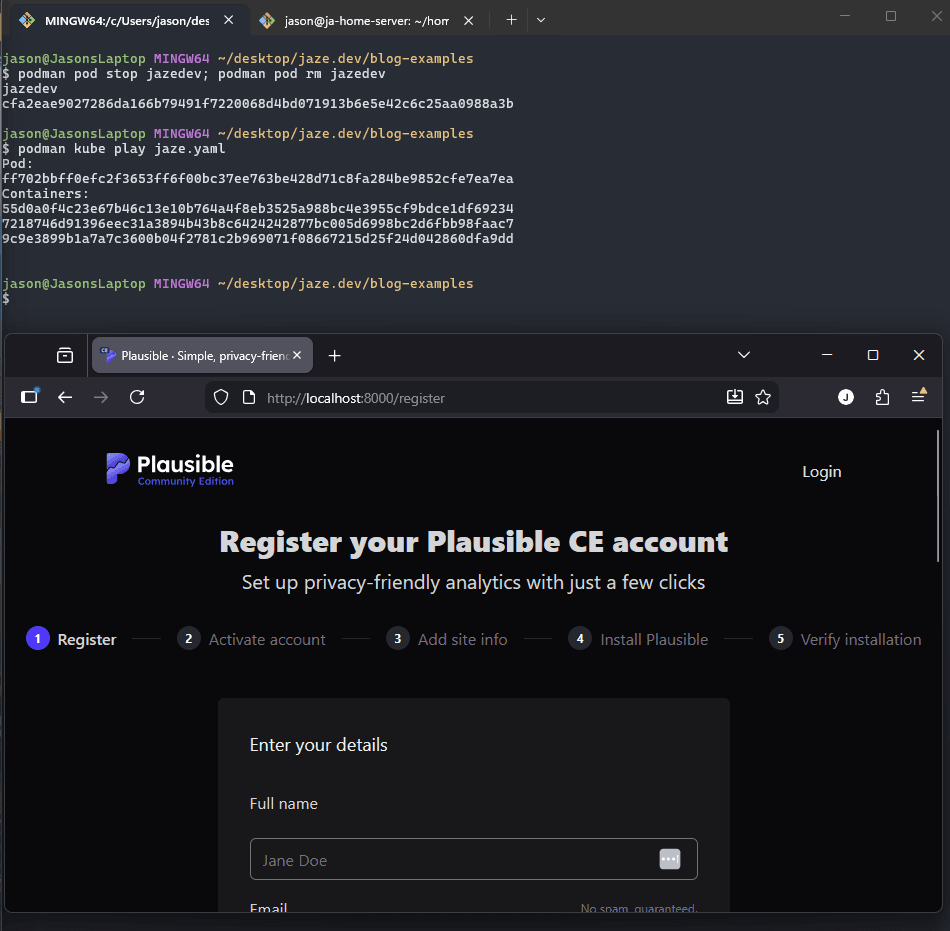
Now we can simply remove the pod we created and run the jaze.yaml file we created to spin up our infra containers on the fly.
podman pod stop jazedev
podman pod rm jazedev

podman kube play jaze.yaml
And after running those commands, and refreshing your browser.. you'll see that that it starts up successfully:
It's that simple, and this way of generating the kube files is a lot less tedious than writing the yaml by hand, trust me.. those things tend to get very verbose quite quickly.
At this point, I can easily spin up, tear down or start my infra for my website as kube also creates a pod, so if I don't want to delete it and it's not running; I can simply start the pod and all my containers will start up. Nice!
However, if we reboot our machine or server, those containers won't start automatically and that leads us to the next part of this walkthrough guide:
Using Podman Quadlets to turn my infra containers into systemd services
Podman handles most of the work for us in this step, all we need to do is give it a simple config file in a specific directory telling podman the who, where and what:
I've created a file called jaze.kube which is a kube quadlet file and it must be placed in this directory (rootless quadlets):
~/.config/containers/systemd
Let's have a look at the file (jaze.kube):
[Kube]
Yaml=path-to-kube-yaml

[Service]
Restart=always

[Install]
WantedBy=default.target
Once you've done that, podman will do the heavy lifting of creating the systemd service file and placing it in the correct directory. All we need to do is trigger the quadlet generator like this:
# work around for podman v4.9 in scenarios where generator doesn't run:
# this manually triggers the generator to create the systemd service files
/usr/libexec/podman/quadlet --user "$XDG_RUNTIME_DIR/systemd/user"

# trigger generator
systemctl --user daemon-reload

# enable our quadlet to start on boot
systemctl --user enable jaze
# start the quadlet now
systemctl --user start jaze
Conclusion
Podman is an awesome tool, little tricky to learn rootless containers at first but with all the built-in extra tooling such as podman kube or podman quadlet; It's a fantastic tool to learn and use without breaking your brain trying to deploy a simple setup with kubernetes.
Those two tools I previously mentioned are also a lot simpler when you use them the way I've highlighted, no need to write your infra manifest files by hand, simply setup your infra and generate it - awesome!
We've covered these awesome features of podman with a real world example from my own setup.
Good luck on your podman adventures with your new tools!
Cheers ;)